


Ever wondered how car designers create those perfectly sculpted vehicles, or how restorers bring classic cars back to life with such incredible accuracy? For a long time, it involved a lot of painstaking manual work: think endless measurements, detailed clay models, and hours of hand-shaping. These traditional methods, while effective, were often incredibly time-consuming, prone to small errors, and frankly, a bit of a headache when dealing with complex shapes or trying to get every detail just right.
But what if you could capture every single curve, every dimension, and every intricate detail of a car or its parts, without even touching it, and get it all perfectly accurate in a fraction of the time? That's where 3D scanning comes in!
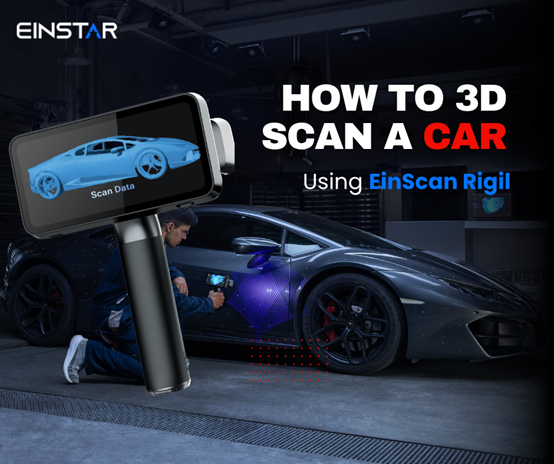
If you starting your automotive business and wondering how to 3D scan cars and, right, if you are looking for what 3D scanner for vehicle can earn you the best ROI, then this blog is just for you.
Step-by-Step Guide: 3D Scanning a Car or Automotive Part
Most professional automotive 3D scanning technology is completely non-contact and non-destructive. It works by capturing the exact three-dimensional shape of an object and turning it into a super-detailed digital 3D model.
It's a efficiency and accuracy driver for everything from designing new vehicles to restoring vintage beauties and custom-modifying existing rides. Now let’s get to see the proper way to 3D scan automotive.
Ready to dive into the world of digital replication? While the process might sound complex, 3D scanning a vehicle or its components can be broken down into a few manageable steps. Here’s how it typically works:

1. Preparation & Planning
Before you even touch a scanner, a little preparation goes a long way. Think of this as setting the stage for a perfect scan.
- Cleanliness is Key: Ensure the car or part is thoroughly clean and free of dust, dirt, grease, or any contaminants. A spotless surface helps the scanner capture accurate data.
- Surface Treatment (if needed): Highly reflective or transparent surfaces (like shiny paint or glass) can be tricky for some scanners. You might need to apply a temporary, non-permanent matte scanning spray to these areas. But EinScan Rigil can realize marker-free scanning due to its laser scanning technology.

- Stabilize the Object: Make sure the car or part is stable and won't move during the scan. Even a slight shift can compromise accuracy. For smaller parts, a sturdy stand or fixture is ideal.
- Lighting and Environment: Work in an environment with consistent, non-harsh lighting. Avoid direct sunlight or strong shadows, which can interfere with the scanner's ability to capture data accurately. If on-site working is a must, then EinScan Rigil that gains strong ambient light adaptability is good for you.
Click to Learn*: How to 3D Scan Dark and Shiny Objects with EINSTAR 3D Scanner?

2. Setting Up the Scanner
Once your object is ready, it's time to set up your portable 3D scanner.
Power Up & Choose Your Working Mode:
EinScan Rigil offers three distinct working modes. Here’s how to power up and select the mode that best suits your needs:
- Standalone Mode: For ultimate portability, no PC connection is required. All scanning and processing tasks are completed directly on the hardware. Simply press and hold the power button to turn on the scanner and begin your scanning session.
- Wireless PC Mode: Leverage the power of your computer without the clutter of cables. This mode uses built-in Wi-Fi 6 for a seamless wireless scanning experience, ideal for complex tasks and large data volumes. Power on the scanner and connect it to your computer via your Wi-Fi network.
- Wired PC Mode: This mode ensures maximum scanning speed and data volume, even in complex network environments. Connect the scanner to its power source and then to your computer using the provided cable.
Additional Setup Steps
- Software Installation: Ensure you have the necessary 3D scanning software installed and updated on your computer.
- Workspace: Arrange your workspace so you have enough room to move around the object, especially if you’re scanning an entire car. Ensure cables aren't a tripping hazard and that there's nothing obstructing your scanning path.
- Create Project Group: If you create a project group, a parent project file will be generated in the defined path. And if a project group is to be opened, the file explorer will let the user select a project group file.

4. Calibration
Calibration is a crucial step that ensures your scanner is performing accurately and consistently.
- Follow Manufacturer Guidelines: Every scanner has its own calibration process. This usually involves scanning a special calibration board or specific targets provided by the manufacturer.
- Environmental Factors: Calibration often accounts for environmental factors like temperature, ensuring the scanner’s optics and sensors are optimally tuned for your current conditions. Don't skip this step!
5. Scan!
Now for the exciting part – the actual scanning process.
- Start Scanning: Activate the scanner and begin moving it around the object, ensuring consistent overlap between scan frames. Most scanning software provides real-time feedback, showing you what areas have been captured and what you still need to cover.
- Target Placement (for some scanners): If your scanner uses reference targets (small, adhesive dots), strategically place them around the object. These targets help the scanner maintain its position and track accurately as you move around the car or part.
- Methodical Approach: Work systematically. For a car, you might start with one side, then move to the front, the other side, the back, and finally the roof. For parts, ensure you capture all angles and any intricate details.
- Check for Gaps: Keep an eye on your software's real-time display to identify any areas the scanner might have missed. Go back and rescan those "holes" until you have a complete digital representation.
6. Post-Process
Once the raw scan data is collected, it needs to be refined and prepared for use.
- Alignment/Registration: If you've taken multiple scans (which is common for larger objects like a car), the software will need to align or "register" them into a single, cohesive 3D model. This stitching process combines all the individual scan data into one complete mesh.
- Cleaning and Filtering (Point Cloud Editing): Raw scan data can sometimes contain noise or unwanted geometry (e.g., reflections from the floor or background objects). Post-processing involves cleaning up this data, removing outliers, and smoothing the surface.
- Meshing: The scattered points captured by the scanner are converted into a connected mesh of triangles or polygons, forming a solid 3D model. Take the meshes editing service EINSTAR provided, you can choose between watertight (fully enclosed, best for 3D printing) or unwatertight meshes (for further editing or inspection). If color data was captured, enhance or correct the texture mapping as needed.

l Export: Once the model is complete, you can export it in various file formats (like STL, OBJ, or PLY) compatible with CAD software, 3D printing, or other applications for further design, analysis, or manufacturing.
How to Choose the Best 3D Scanner for Automotive and Car Parts Scanning
Selecting the ideal automotive 3d scanner, whether it's for an entire car or intricate individual parts, requires careful consideration. The market offers a wide range of devices, each with its strengths and limitations. Here are the key factors to weigh when making your decision:
Object Size: This is perhaps the most critical factor.
Whole Car Scanning: For scanning an entire vehicle, you'll need a scanner with a large scanning volume and a fast capture rate. Handheld scanners are often preferred for their flexibility in navigating around a car.
Small Parts Scanning: For smaller, more intricate components like engine parts, trim pieces, or interior elements, a scanner with higher resolution and accuracy is required to capture fine details.
Required Accuracy: How precise do you need your digital model to be?
For reverse engineering critical mechanical components or ensuring perfect fitment for custom parts, high accuracy (often measured in millimeters or even micrometers) is essential.
Accuracy is defined as "the degree to which a measurement result conforms to the correct value or standard" and is essentially the closeness of a given set of measurements to the agreed value/object's true value. In general, accuracy is the result of measurement under ideal conditions. It cannot be judged by visual effects alone, quoted The Accuracy of Einstar: What You Really Need to Know by Einstar.
For general documentation or less critical modifications, slightly lower accuracy might be acceptable, which can also impact the scanner's price.
Considering Your Walled & Experience
Budget: 3D scanner for vehicle ranges from a few hundred to tens of thousands of dollars. Define your budget early on, but remember that the cheapest option isn't always the most cost-effective in the long run if it doesn't meet your needs for accuracy or efficiency.
Portability: Will you scan vehicles in a fixed workshop, or do you need to take the scanner to different locations (e.g., a junkyard, a client's garage)? Handheld and lightweight scanners offer greater portability.
Ease of Use: Consider the learning curve. Some professional-grade scanners require significant training, while others are designed for more intuitive operation. Software complexity also plays a role here.
EinScan Rigil – Your Work Buddy is Standing By!
For professional automotive 3D scanning, including both large objects like entire cars and smaller, detailed parts, the recent-launched EinScan Rigil stands out as a highly recommended option.
First thing first, it is a Blue Laser standalone scanner, what every 3D scanner hobbyist and pro looking for.
The multiple crossed blue laser lines ensure lightning-fast scanning, while parallel lines are perfect for capturing fine details and deep holes often found in engine components or car interiors. IR handles reflective/dark surfaces well.

On top of that, ensures highly precise digital models is crucial for reverse engineering, custom part fabrication, or quality control where exact dimensions are non-negotiable across large areas like a car body.
Besides, EinScan Rigil is gathered by powerful integrated hardware allows for truly standalone operation, reducing the need for an external computer during scanning and providing a seamless user experience with real-time feedback on its high-resolution screen.

|
Camera Resolution |
3D: 2.3MP*2 & 1.3MP*2 Texture: 5MP |
EinScan Rigil features high-resolution 3D cameras to ensure crisp geometric capture, while the 5MP texture camera provides vibrant, accurate color information for realistic digital models, essential for aesthetic design or virtual showcasing.

The handheld 3D scanner weights only 870g (with batteries) and comes with a compact body (233 × 180 × 72.8 mm) that allows easy maneuvering around vehicles and scanning in tight spaces, making it perfect for both workshop and on-location jobs. It is an anti-fragile gear considering its built-in temperature control system that guarantees consistent accuracy and performance even during extended scanning sessions or in fluctuating workshop temperatures.
Last, but intriguing, it is a tri-mode 3D scanner, that can support Wireless Standalone / PC-Wireless / PC-Wired working, which means you can scan the car directly on the device or leverage PC power for complex tasks.

Revolutionize Your Automotive Workflow with 3D Scanning
Embrace the future of automotive work with the precision and efficiency that only 3D scanning can offer. For professional-grade results that push the boundaries of what's possible, the EinScan Rigil is the ultimate choice to drive your projects forward.
Share:
Choosing the Right Light Source for Better 3D Scans—No More Guesswork
How to activate EXModel Personal's one-year trial