









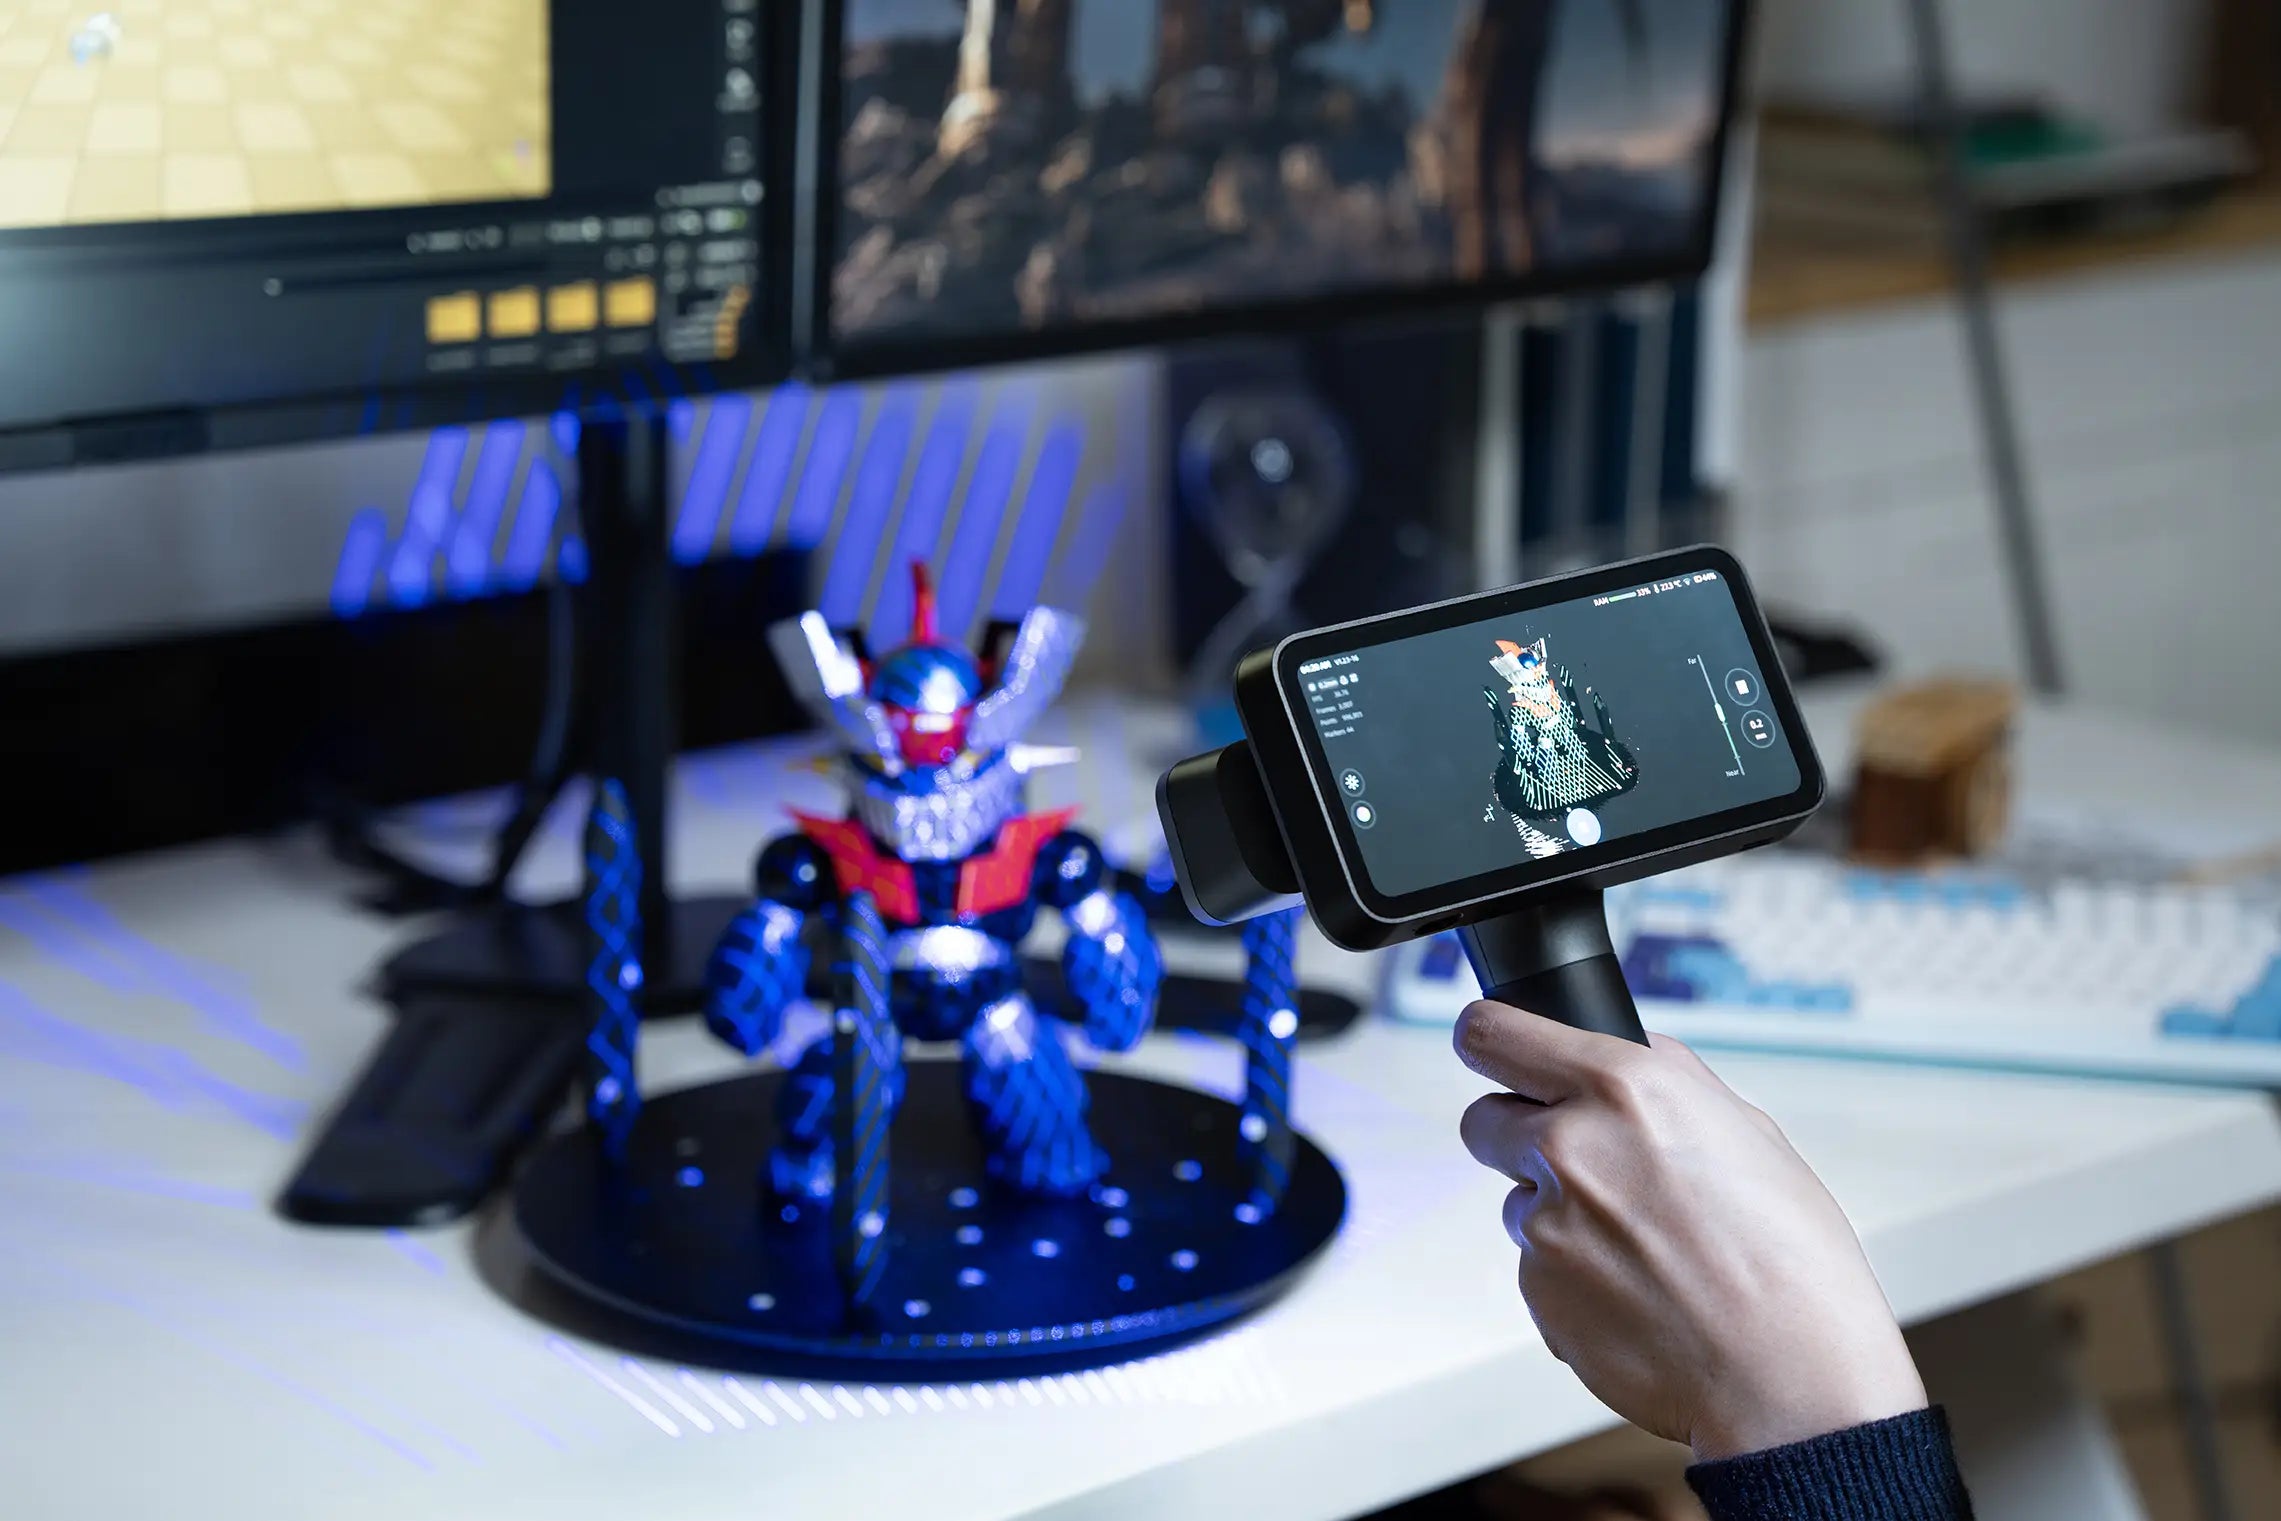
When you need a 3D model of something real, photos are usually the easiest place to start. A drone can cover a roof or job site quickly. A camera can capture rich texture on a statue, facade, or landscape. But once the project involves small parts, glossy surfaces, tight dimensions, or scan-to-CAD and 3D-printing workflows, photos can reach their limits quickly.
That is where 3D scanning vs photogrammetry matters. Photogrammetry builds 3D data from overlapping images. 3D scanning uses dedicated hardware to measure the object or scene more directly.
This guide compares photogrammetry vs 3D scanning across accuracy, texture, cost, surface limits, workflow, and real use cases, so you can choose the method that fits your project instead of guessing from the tool name.

What Is Photogrammetry?
Photogrammetry creates 3D data from overlapping photosWhen 3D Scanning Becomes the Better Next Step The software looks for the same visual details across multiple images, estimates where each camera was, and uses those matches to rebuild the subject in 3D.
A good photo set matters more than beginners often expect. Each part of the subject needs to appear in several images from different angles, so the software has enough shared detail to match. From there, the workflow may generate a sparse point cloud, dense point cloud, mesh, texture, orthomosaic, or elevation model, depending on the project.

Photogrammetry is widely used in drone mapping, architecture, archaeology, cultural heritage, game assets, construction documentation, and large outdoor scenes. When the photos are sharp, well overlapped, and consistent, it can produce excellent color and texture. When overlap is weak, lighting changes, the subject moves, or the surface is glossy, plain, or low-texture, reconstruction becomes much less reliable.
What You Need for Photogrammetry
A basic setup may include a camera, smartphone, or drone, plus photogrammetry software. You also need steady lighting, enough overlap, sharp images, and a subject that does not move during capture.
If the result needs to be measured, you may also need scale bars, coded targets, ground control points, camera calibration, or known reference dimensions. Without scale control, a model can look convincing and still be wrong.
Pros and Cons of Photogrammetry
Photogrammetry is strongest when the subject has enough visible detail for the software to match across photos. It can be a smart choice for large scenes, outdoor sites, textured objects, and projects where realistic color matters as much as shape.
Where photogrammetry works well:
- It can start with a camera, smartphone, or drone.
- It often produces strong color and realistic texture.
- It works well for roofs, facades, terrain, landscapes, monuments, and large outdoor areas.
- It is useful for mapping, cultural heritage, site documentation, game assets, and visual records.
- The entry cost can be lower if you already have the capture equipment.
Where photogrammetry can struggle:
- It depends heavily on photo quality, overlap, lighting, and surface texture.
- Smooth, shiny, transparent, plain, or repetitive surfaces can be difficult to reconstruct.
- Moving subjects, shifting shadows, glare, water, and vegetation can confuse the software.
- Large photo sets can take time to process and clean.
- A model can look realistic while still being inaccurate in scale or geometry.
When comparing photogrammetry vs 3D scanning, photogrammetry is excellent for visual realism and large-area capture, but it needs careful shooting if the result has to be dimensionally reliable.
What Is 3D Scanning?
3D scanning uses dedicated hardware to capture the shape of a real object or environment. Depending on the capture method, the device may use structured light, LiDAR, or depth-sensing technology. In some systems, terms like laser or infrared light refer to the light source rather than a separate scanning category.
For object-level work, the main advantage is control. You can often see scan coverage as you move around the object, which makes it easier to catch missing areas before the session is over. That matters when you are scanning a product prototype, body part, sculpture, engine component, or object for 3D printing.
The output may be a point cloud, mesh, or textured 3D model, depending on the scanner and software.

Common Types of 3D Scanning
Common 3D scanning methods include structured light scanning, laser scanning, LiDAR scanning, and depth-camera scanning. These systems may be handheld, desktop, tripod-based, or mobile.
Structured light and laser scanners are often used for objects, people, product design, education, reverse engineering, and inspection. LiDAR is more common for buildings, terrain, infrastructure, mapping, and large spatial environments. Depth-camera systems can be useful for quick capture, though they usually do not offer the same level of detail as specialized scanners.

Pros and Cons of 3D Scanning
3D scanning makes the most sense when the project depends on shape. If you need to capture a real object with reliable geometry, check dimensions, rebuild a part, or prepare a model for 3D printing, a scanner gives you a more controlled workflow than a photo-only method.
Where 3D scanning works well:
- It captures surface geometry more directly than photogrammetry.
- Many scanners show scan coverage during capture, so missed areas are easier to catch.
- It is well suited for small objects, product prototypes, mechanical parts, sculptures, body scans, and detailed surfaces.
- It can support reverse engineering, inspection, mesh editing, 3D printing, and scan-to-CAD workflows.
- It is easier to control when scale, shape, and repeatability matter.
Where 3D scanning can struggle:
- The hardware usually costs more than starting with a camera.
- Reflective, transparent, dark, or very fine surfaces may still need preparation.
- Choosing the wrong scanner for the object size can lead to poor results.
- Some workflows require markers, scanning spray, calibration, or manual cleanup.
- Large scan files may need capable software and hardware to process smoothly.
For projects where the final model needs to be measured, edited, printed, or compared with CAD, 3D scanning is often the more practical side of 3D scanning vs photogrammetry.
Photogrammetry vs 3D Scanning: Key Differences
A better comparison starts with the result you need after capture.
| Factor | Photogrammetry | 3D Scanning |
|---|---|---|
| Geometry capture | Rebuilds shape from image matches | Measures surface shape more directly |
| Texture | Often strong with good photos | Depends on scanner camera and software |
| Feedback | Usually clearer after processing | Often visible during capture |
| Starting cost | Can start with a camera or drone | Usually higher hardware cost |
| Best at | Large scenes and visual realism | Controlled object geometry |
| Common risk | Poor overlap, weak texture, lighting changes | Wrong scanner or difficult surface |
Accuracy and Dimensional Reliability
If a model needs to fit, measure, compare, or guide production, geometry matters more than appearance. In those cases, 3D scanning is usually easier to control.
Photogrammetry can be accurate, but it needs discipline: strong overlap, camera calibration, scale references, and sometimes control points. Without those, a model may look right while being slightly off in size or shape.
Texture and Visual Realism
Photogrammetry often has the edge in visual realism because it builds texture from real photos. That makes it useful for cultural heritage, game assets, VFX, maps, landscapes, facades, and outdoor documentation.
3D scanners can also capture color, but the result depends on the scanner camera, lighting, and software. If realistic surface appearance is the main goal, photogrammetry may be the better first step.
Cost and Workflow Time
Photogrammetry can be cheaper to start, especially if you already own a camera or drone. But the total workflow can still be time-consuming: shooting, organizing photos, processing, scaling, cleaning, and fixing failed areas.
A 3D scanner costs more upfront, but the live feedback can save time. If you miss a surface, lose tracking, or need another angle, you can often fix it while the object is still in front of you.
Surface and Environment Limits
Photogrammetry needs visual features. Plain white objects, glossy product shells, glass, transparent parts, moving foliage, water, smoke, and changing shadows can all cause problems.
3D scanning has its own limits. Reflective, transparent, dark, or very fine surfaces may still need preparation. The difference is that a dedicated scanner usually gives you more feedback during capture, so problems are easier to spot early.

7 Practical Things to Consider Before Choosing
Price matters, but it is a poor first filter for this decision. Start with the thing most likely to fail.
1. Good Texture Can Hide Poor Geometry
A photogrammetry model can look beautiful and still measure badly. Texture can make a surface look detailed even when the underlying geometry is soft, warped, or incomplete.
For visualization, that may be acceptable. For inspection, reverse engineering, or part reproduction, it is not.
2. Moving Subjects Are Hard for Photogrammetry
Photogrammetry works best with a still subject. People, fabric, traffic, water, and shifting shadows can confuse the image-matching process.
For body scanning, product scanning, or quick object capture, a 3D scanner is often easier to manage.
3. Surface Texture Changes the Result
A rough brick wall gives photogrammetry plenty of details to match. A glossy white product shell does not.
3D scanners also care about surface behavior, but they are usually less dependent on visual texture alone. That can make a real difference for small objects, industrial parts, and smooth surfaces.
4. Real-Time Feedback Reduces Rework
With many 3D scanners, you can see coverage during capture. If part of the model is missing, you can scan that area again immediately.
With photogrammetry, you may not know the photo set failed until after processing. That delay can be costly if the object, site, or lighting condition is no longer available.
5. Accuracy Depends on Control
Neither method is accurate just because the model looks detailed.
For 3D scanning, accuracy depends on scanner performance, calibration, tracking, alignment, and operator technique. For photogrammetry, it depends on image quality, overlap, lens calibration, scale references, control points, and processing settings.
6. Indoor and Outdoor Projects Behave Differently
Photogrammetry is often a strong choice for outdoor drone mapping, especially when the area is large, textured, and well lit.
Indoor work can be harder. Tight spaces, weak lighting, repetitive surfaces, and limited camera movement can reduce reliability. For indoor objects and smaller subjects, 3D scanning is often the more practical option.
7. Workflow Cost Is More Than Hardware Cost
The cheapest capture tool is not always the cheapest project.
Think about software, training, setup time, processing time, cleanup, failed captures, file conversion, and whether the output can move into CAD, BIM, inspection, mesh editing, or 3D printing without extra work.
Choosing the Right Method for Your Use Case
When comparing a 3D scanner vs photogrammetry, start with the final deliverable. A textured model for a visual presentation, a drone map, a scan-to-CAD reference, and a 3D-printable mesh all ask for different kinds of data.
Best Starting Point by Project Type
| Project Goal | Better Starting Point | Why |
|---|---|---|
| Drone mapping a site | Photogrammetry | Large outdoor areas fit photo-based capture |
| Cultural heritage | Depends | Photogrammetry helps texture; scanning helps geometry |
| Product visualization | Depends | The project may need both shape and texture |
| Game or VFX assets | Depends | Texture, topology, and cleanup decide the workflow |
| Reverse engineering a part | 3D scanning | Geometry and dimensions matter |
| Quality inspection | 3D scanning | CAD comparison needs controlled shape data |
| 3D printing an object | Often 3D scanning | A clean mesh needs complete surface capture |
| Indoor object capture | 3D scanning | Real-time feedback and control help |
For outdoor mapping, large sites, roofs, terrain, or scenes where texture is the main goal, photogrammetry can be a smart choice. For indoor objects, small parts, sculptures, product prototypes, body scans, or projects that need more controlled geometry, 3D scanning is often the cleaner route.
When 3D Scanning Becomes the Better Next Step
For many teams, this moment comes after a photo-based model almost works. The texture looks good, but the edges are soft. The scale needs checking. The mesh takes too much repair before it can be edited, printed, or used as a reliable reference.
EINSTAR, powered by SHINING 3D, supports practical 3D scanning workflows across 3D printing, personal manufacturing, education, aftermarket, and engineering. For small objects, product prototypes, sculptures, body scans, and indoor capture, an EINSTAR scanner can give users more control over real-world shape and a clearer path into usable 3D model workflows. If you are comparing object size, surface type, accuracy needs, and downstream output, it is worth taking time to choose the right 3D scanner.

That does not make photogrammetry the wrong choice. It is excellent for many outdoor, textured, and large-scene projects. But when the job moves toward controlled object capture, a dedicated scanner can make the process easier to trust.
FAQ
Is Photogrammetry Better Than 3D Scanning?
Not across the board. Photogrammetry is strong for textured subjects, drone mapping, and visual models. 3D scanning is usually better when geometry, scale, repeatability, or real-time feedback matters.
Can Photogrammetry Be as Accurate as a 3D Scanner?
It can be accurate with the right setup, including good overlap, camera calibration, scale references, and control points. For many object-level engineering workflows, a dedicated scanner is still easier to control.
Which Is Better for Small Objects?
For small objects, 3D scanning is often the better starting point. It is especially useful when the object has fine detail, weak texture, dark color, reflective areas, or needs to become a clean mesh.
Which Is Better for Outdoor Sites?
Photogrammetry is often a strong choice for outdoor sites, especially with drones. It works well for roofs, land, facades, job sites, stockpiles, and terrain. For direct distance measurement or low-texture environments, LiDAR or another scanning workflow may be better.
Can You Combine 3D Scanning and Photogrammetry?
Yes. Some projects use scanning for geometry and photogrammetry for texture or large-area context. This can be useful when you need both accurate shape and strong visual realism.
Which Is Cheaper, 3D Scanning or Photogrammetry?
Photogrammetry is usually cheaper to start. But total cost also includes shooting time, processing, cleanup, failed attempts, software, and whether the final model is accurate enough for the next step.
Conclusion
In this guide, we compared 3D scanning vs photogrammetry across accuracy, texture, cost, workflow time, surface limits, and real project needs. The better choice is the one that gives you usable data with the least rework.
For outdoor scenes and texture-rich visual work, photogrammetry can be a strong starting point. For physical objects, small parts, product design, education, reverse engineering, inspection, and 3D printing, 3D scanning often gives you a more controlled path from real-world shape to usable 3D data. That is where EINSTAR 3D Scanner can help users work with more feedback, clearer capture control, and a smoother path from scan to model.
Ready to explore easier 3D scanning with EINSTAR?
Share:
Why Accuracy Claims Matter
What Is a Point Cloud? A Practical Guide to 3D Scanning Data