







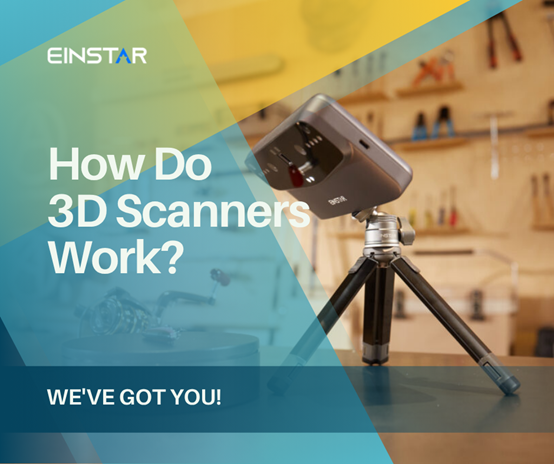
Have you ever wondered how a real-world object, from an intricate sculpture to a classic car part or even your favorite coffee mug, can become a digital 3D model? That's what a 3D scanner makes possible. It captures an object's shape and surface details, turning them into digital data for design, reverse engineering, or 3D printing.
But how does a 3D scanner work? It depends on the technology. Some scanners use lasers to measure an object's surface, while others project patterns of light to capture its shape and details. In this guide, we'll explain how 3D scanners work, explore the main scanning technologies, and show how 3D scanning turns physical objects into usable digital models!
What Is a 3D Scanner?
A 3D scanner is a device that captures the shape and surface geometry of a physical object and converts it into digital 3D data. Depending on the technology, it may also capture color and texture.
Unlike a conventional camera, which primarily records a 2D image, a 3D scanner collects spatial information that can be used to create a digital representation of an object's surface. These digital models support applications such as reverse engineering, quality inspection, product design, and 3D printing. Depending on the application, the scan data may need further processing before it can be used.

What Is 3D Scanning?
3D scanning is the process of capturing measurements from a physical object's surface and converting them into digital 3D data. If you're wondering what is 3D scanning or what is a 3D scan, the key idea is that 3D scanning captures the geometry of an existing object rather than creating a model entirely from scratch.
The resulting data is commonly represented as a point cloud or a 3D mesh. Understanding how these two formats work helps explain the 3D scanning process and how scanned data can be used in applications such as reverse engineering, digital modeling, and 3D printing.

The Raw Data: Point Clouds
When a 3D scanner (except for some industrial 3D scanners that support meshes generation) "sees" an object, it doesn't immediately create a perfect, solid model. Instead, it captures millions of individual measurements, each representing a tiny point on the object's surface in three-dimensional space.
This raw data forms what's known as a scanner point cloud. Imagine a collection of dots, each representing a measured point on the object's visible surface with X, Y, and Z coordinates. This point cloud captures the object's surface geometry, though the data may contain noise, measurement uncertainties, occlusions, or gaps in areas that were not captured.
Building the Surface: Meshes
While a point cloud provides raw spatial data, it is not a ready-to-use 3D model for most applications. To transform these discrete points into a continuous surface representation, specialized software processes the point cloud and connects the data points to form a mesh.
A mesh consists of interconnected vertices (points), edges (lines connecting vertices), and faces (usually triangles or quadrilaterals) that represent an object's surface geometry. Depending on the geometry and processing requirements, a mesh may be watertight or unwatertight, with a fully enclosed surface, or unwatertight, with open boundaries or gaps.
Both types can support workflows such as inspection, reverse engineering, and further 3D editing. For 3D printing, a watertight mesh is generally preferred, although additional checks may be needed to ensure the model is suitable for 3D printing.
3D Scanning and Imaging Process
So, the fundamental 3D scanning and imaging process can be visualized as a clear progression:
Physical Object → A Point Cloud Representation → A Final Mesh Model
This transformation is the essence of non-contact metrology and lays the groundwork for bringing the physical world into the digital one.
How Does a 3D Scanner Work?
Although 3D scanning technologies differ, the general workflow involves capturing surface information, calculating 3D coordinates, aligning measurements when necessary, and processing the data into a usable 3D representation.
Here's how a 3D scanner works in a typical workflow.
Step 1: Capture the Object's Surface
The scanner collects surface information using its measurement technology. A laser triangulation scanner observes a laser spot or line, while a structured light scanner analyzes a projected pattern. Other systems may use depth measurements or image-based reconstruction.
Multiple views may be needed to capture areas hidden from the scanner's initial position.
Step 2: Calculate 3D Coordinates
The scanner converts its measurements into 3D coordinates. Depending on the technology, this may involve triangulation geometry, projected-pattern analysis, or time-of-flight measurements.
The resulting coordinates describe measured positions on the object's surface.
Step 3:Track and Align the Measurements
When a scanner captures multiple views, the software may need to determine how those measurements fit together. Depending on the system, real-time tracking can use markers, visual features, geometric information, or other positioning methods.
Overlapping scans are then aligned into a common coordinate system. This process is called registration, which may happen during scanning or during post-processing.
Not every scanner uses the same tracking method, and some fixed systems measure from a calibrated position rather than tracking a handheld device.
Step 4: Generate a 3D Representation
The software processes the captured measurements into a point cloud or, depending on the system, a mesh. When a surface model is needed, point cloud data can be processed to generate a mesh.
The exact sequence depends on the scanner and software. Some systems perform alignment and processing during capture, while others require additional post-processing.
Step 5: Prepare the Data for Use
The scan may need further processing before it is ready for its intended application. Common tasks include removing unwanted points, refining the mesh, comparing measurements with reference geometry, and preparing a model for 3D printing.
For reverse engineering, additional CAD reconstruction may be necessary to create editable geometry.
How Are 3D Scanning Methods Classified?
Just as our eyes perceive the world in different ways depending on light conditions or our focus, 3D scanners employ various methods to capture the geometry of an object.
These methods fall into two primary categories based on how they interact with the object: Contact Scanning and Non-Contact Scanning.

Source: https://www.einscan.com/applications/3d-scanning-101-all-you-should-know-about-3d-scanning-2/
1. Contact Scanning: The Touch-Based Approach
As the name suggests, contact scanning involves physically touching the object's surface to measure its dimensions. These systems typically use a probe or stylus that moves across the object, recording precise coordinates at each point of contact.
While contact scanners offer exceptional accuracy, particularly for defined points, they can be slower and might not be suitable for delicate or deformable objects.
2. Non-Contact Scanning: Measuring Without Touching
Non-contact scanning methods capture data without any physical interaction with the object. They can scan a wide range of materials and applications. This broad category can be further divided:
Passive Non-Contact Methods
Passive methods do not emit any energy (like light or sound) themselves. Instead, they rely on ambient light or existing energy emitted by the object. While not "scanners" in the traditional active sense, they are crucial for 3D reconstruction and creating 3D models. Passive non-contact also has its branches stemming from “Shape from X”, but it is not the focus today.
Active Non-Contact Methods
Active types of 3D scanners emit their own energy (light, laser, sound, X-rays) and then analyze how that energy interacts with the object to determine its shape. These are the most common and versatile 3D scanning technologies.
For 3D scanners used in common projects, optical active plays the main role. So, in the next section, let's detail this type of 3D scanner.
How Do Active Optical 3D Scanning Technologies Work?
Active optical 3D scanners are distinguished by their use of light - be it laser, structured patterns, or pulsed beams - to illuminate an object and capture its geometry. The way this light interacts with the surface and is observed by a camera forms the basis of 3D data acquisition.
1. Laser Light 3D Scanning: Precision Through a Point or Line
One of the earliest and still highly effective active optical methods involves laser light.
Principle
Laser scanners typically project a single laser dot or a laser line onto the object's surface. A camera, positioned at a known offset from the laser emitter, observes the position of this dot or line.
Because the camera and laser are separated by a fixed distance (the "baseline"), the displacement of the laser line across the object's surface allows the system to estimate the distance to each measured point using trigonometric principles, hence, triangulation. As the laser moves across the object or the object rotates, millions of these measurements are collected to generate a scanner point cloud.

Applications
Laser scanners are renowned for their high accuracy and ability to capture intricate details. They are widely used in quality control, reverse engineering, inspection of industrial parts, and even cultural heritage preservation, where precision is paramount.
2. Structured Light 3D Scanning
Perhaps the most common and versatile active optical method for general-purpose scanning, especially for objects that fit on a desktop or require quick capture, is structured light 3D scanning.
Principle
Unlike a single laser point, a structured light 3D scanner projects a known pattern of light onto the object's surface. This pattern can be anything from simple parallel lines to complex grids or random dot arrays.
A camera captures how this projected pattern deforms or distorts as it falls over the object's contours. Just like with laser triangulation, the system analyzes these distortions to calculate the depth and shape of the surface, creating a highly detailed 3D reconstruction.


Light Patterns/Technologies within 3D Structured Light
- Phase Shift: Projects a series of patterns that shift in phase (like waves). By analyzing how these phase shifts are distorted, these scanners can achieve incredibly high accuracy and dense point clouds, often down to microns.
- Multi-Line: Projects multiple parallel lines simultaneously onto the object. It allows for faster data capture compared to single-line scanning, making it efficient for handheld 3D scanners for 3D printing or quickly scanning larger areas.
- Speckle (or Random Dot/Coded Light): Projects a random pattern of dots or a unique "coded" light pattern onto the object. This allows for very fast capture rates, making it suitable for handheld scanning where movement is involved, as each captured frame contains enough unique information for triangulation.
The projection of these intricate light patterns relies on sophisticated display technologies:
- Digital Light Processing (DLP): Often found in projectors, DLP chips contain millions of tiny mirrors that can be individually tilted to create and project the precise light patterns required for structured light scanning.
- Diffractive Optical Elements (DOE): These are optical components that can split or shape a single light beam into a specific pattern, like a grid or an array of dots, without the need for complex digital projection.
- VCSEL (Vertical-Cavity Surface-Emitting Laser): While a type of laser, VCSEL arrays are increasingly used in structured light systems, particularly for speckle patterns, due to their efficiency, compact size, and ability to emit multiple laser beams simultaneously.

White Light & Blue Light
Within structured light scanning, you'll often hear about "white light" and "blue light" scanners.
- White Light: Traditional structured light scanners often use white light, which is broad-spectrum.
- Blue Light: Many modern structured light scanners use blue light. This is because blue light has a shorter wavelength, which can lead to higher resolution and more accurate data capture, particularly for darker or more challenging surfaces. Blue light also reduces interference from ambient light, improving accuracy in varied environments.
3. Time-of-Flight (ToF) 3D Scanning
ToF scanners emit a pulse of light (often infrared) and then measure the exact time it takes for that light pulse to travel from the scanner, hit the object's surface, and return to the scanner's sensor.
What Can You Use a 3D Scanner For?
3D scanning is used across a wide range of industries to capture real-world objects as digital models. Here are some common 3D scanning applications:
- Reverse Engineering: A 3D scanner captures the geometry of existing parts to support CAD reconstruction, reverse engineering, and design modifications.
- Quality Inspection: 3D scanning compares captured geometry with reference data to identify dimensional differences and support quality control.
- Product Development: Digitizes prototypes and physical objects for design review, product development, and iteration.
- 3D Printing: Creates digital geometry that can be prepared for 3D printing, depending on mesh quality and model requirements.
- Art and Cultural Preservation: Uses 3D scanning to document sculptures, artifacts, and other objects in digital form.
- Automotive and Aerospace: Applies 3D scanning to capture components and complex surfaces for inspection, documentation, and engineering workflows.
Digital Content Creation: Converts real-world objects into digital 3D models for visualization and content production.
The best results depend on selecting a scanner that matches the object's size, surface characteristics, required detail, and intended use.
Explore 3D Scanning with EINSTAR
Whether you're digitizing a physical object, capturing complex geometry, or preparing scan data for reverse engineering, understanding how 3D scanners work helps you choose the right technology for your project.
Explore the Einstar 3D scanner lineup to find a solution suited to your scanning needs.
FAQ About 3D Scanning
Q1: Can a 3D Scanner Scan Black, Shiny, or Transparent Objects?
Yes, but these surfaces can be challenging for some optical 3D scanners. Dark surfaces may return less light to the sensor, reflective surfaces can redirect light unpredictably, and transparent materials can transmit or refract light. Results depend on the scanner and surface properties. Some objects may require special settings or surface preparation.
Q2:How Accurate Is a 3D Scanner?
The accuracy of a 3D scanner depends on its specifications, calibration, working distance, and scanning conditions. Resolution is a separate factor that describes the level of detail a scanner can capture. Before choosing a scanner, check both specifications and make sure they meet your application's requirements.
Q3: How Long Does 3D Scanning Take?
Scanning time depends on the object's size, complexity, required detail, and the number of views needed. Capturing a simple object generally takes less time than scanning a complex one. Data alignment, mesh generation, and cleanup can also add to the total processing time.
Q4: Can You Edit a 3D Scan in CAD Software?
A 3D scan usually produces a point cloud or mesh rather than a parametric CAD model. Scan data can be imported into compatible software, but modifying dimensions or design features may require reverse engineering or CAD reconstruction.
Conclusion
3D scanning captures the shape and details of physical objects, turning them into digital models for a wide range of applications. Understanding how 3D scanners work and the differences between scanning technologies helps you choose the right scanner for your needs.
Ready to get started? Explore EINSTAR 3D scanners to find the right tool for your next 3D scanning project.
🚀 Ready to exlpore your 3D scanning journey?
Share:
Last Guide to 3D Print File Type You’ll Ever Need
How can I obtain EXModel license